
Today we've only got one more hurdle until our long-awaited 2-week holidays! It's a psychiatry exam, so who knows how it'll go. That aside, we will soon be able to go crazy with ze olde blog and some DIY projects that have been a-waiting so patiently to be done. Mucho excitement!
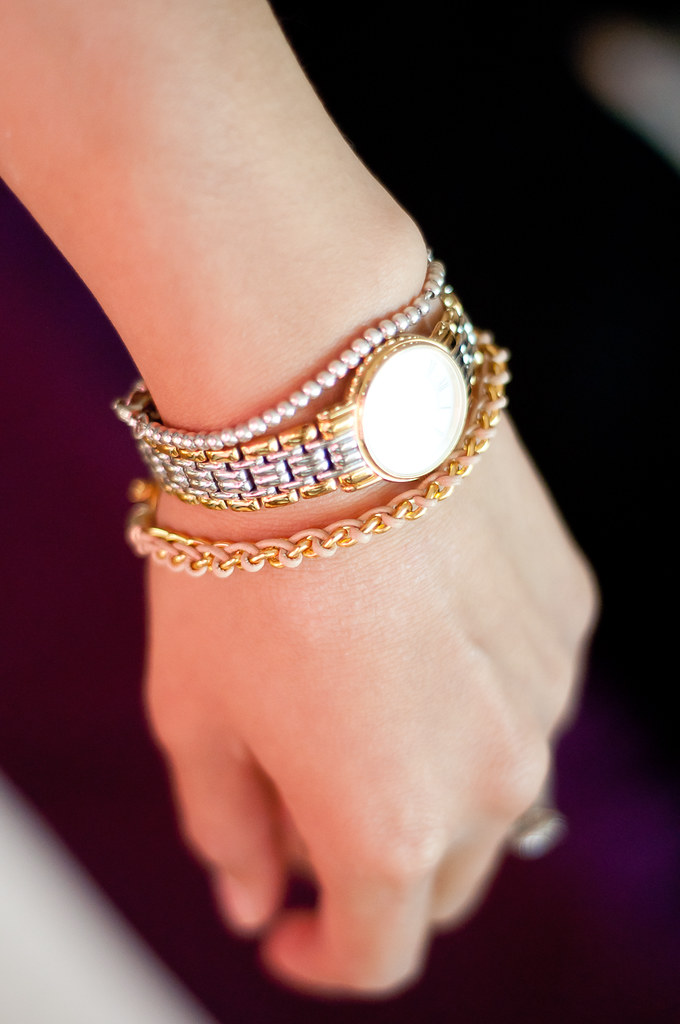
Today's DIY Friday project is an easy-peasy bracelet (which looks harder than it really is!) - if you can't get hold of leather cord, then you can substitute it for something else. I won't judge you if you buy faux leather. Just don't tell me.
DIY Leather & Chain Bracelet
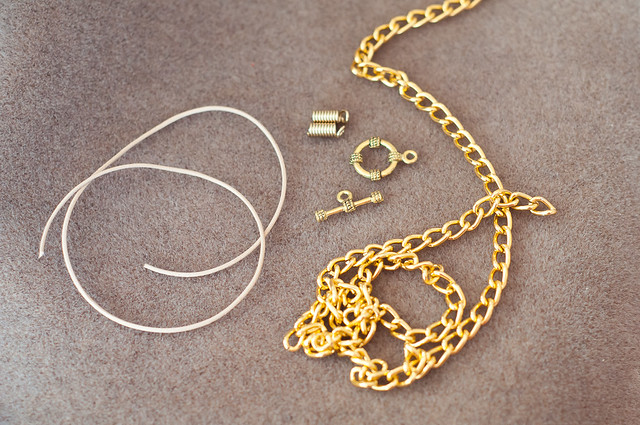
Materials:
A length of chain (your choice of colour, but make sure it's big enough for the leather cord to be threaded through)
Leather cord
Beading fixings & clasp (as shown above)
Scizzorzzz & pliers

Start off by jamming one end of the leather cord into the twisty coil thing. Use your pliers to clamp it down so the leather cord is secure and can't come loose.
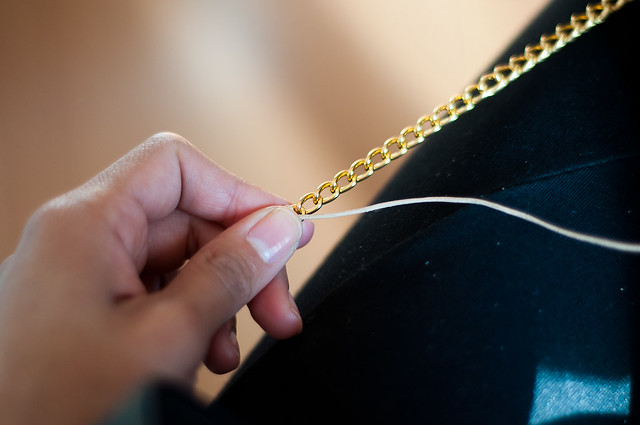
Once that's done, thread the cord through the first loop of your chain, pulling it through to the end where the twisty thing is secured. Hold on tight! Time for some loopy-doopy moves:

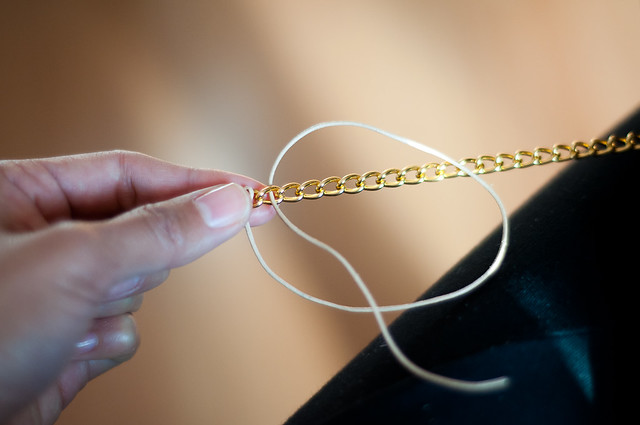
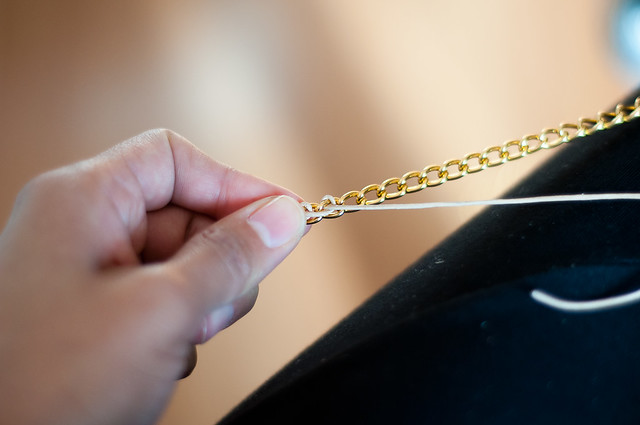
Loop the cord OVER to the back of the chain, stick it THROUGH the hole so it comes out the FRONT, and make sure it loops through the cord left over from the front. Pull it tight. Does that even make sense? I can't say I'm great at explaining random things like this, so I hope the photos suffice.
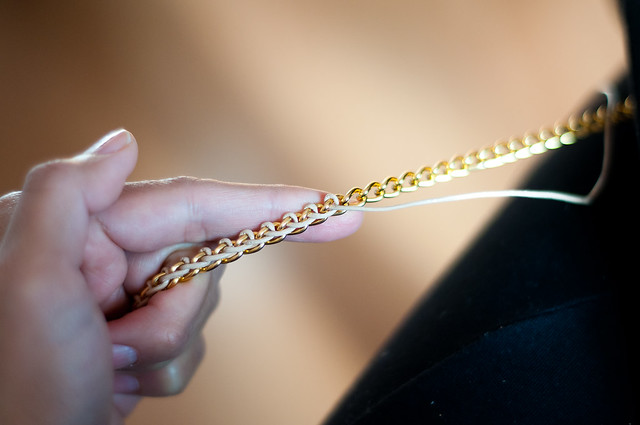
Keep looping until you get to your desired length.
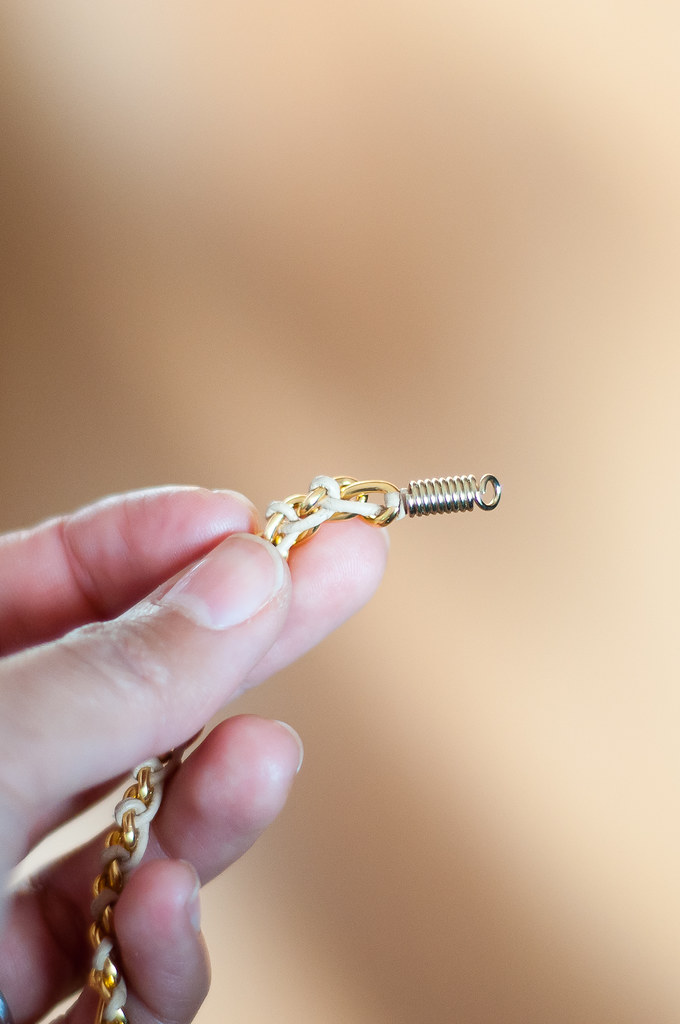
Once you get to the end, jam the leather cord into another one of those spiral end thingos and clamp it tight so your hard loopy work doesn't come undone.
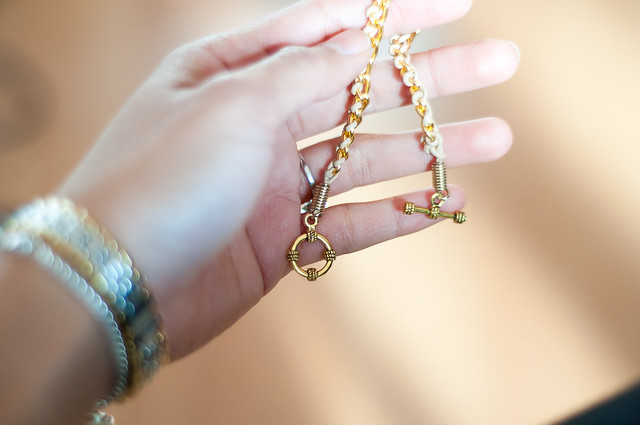
Attach the clasps, and you're done!

xx T
Wow this looks incredibly, and so simple! Definitely something to add to my DIY list :)
ReplyDeleteThanks Jamie-Lee! It is indeed super simple :)
DeleteWow this is awesome. My brain is boggled.
ReplyDeleteOnce you start you'll be amazed at how easy it is haha!
Deletei am normally too lazy to try these things but this looks so simple and gorgeous !!!
ReplyDeletewww.moustachic.com
www.moustachic.com
www.moustachic.com
That is super cute! I love the way that turned out. It would be so easy to customize with different colored leather cord too.
ReplyDeleteKelsy
http://looseendscraftblog.com
Thanks Kelsy! Definitely - you could also thread on little charms as you go etc. :)
DeleteThis is such a cute idea! Lovely DIY x Sushi
ReplyDeletei like bracelet..Great blog, thanks for sharing. this blog is very useful .
ReplyDeleteGreat..sharing. this tutorial. is very useful .
ReplyDeleteThat looks awesome.... http://www.psdaimaandsons.com
thanks for sharing
ReplyDeleteAmazing and well done! So cute, looks great.
That looks awesome...www.psdaimaandsons.com
Thanks Shikha :)
Deletemost well come .This is such a cute idea
DeleteWow this is awesome. i like it.. :) :)
ReplyDeletehttp://www.psdaimaandsons.com/
Look so cute. I wonder where to buy those materials though.
ReplyDelete